Tuesday, November 16, 2010

5 Braids Fun


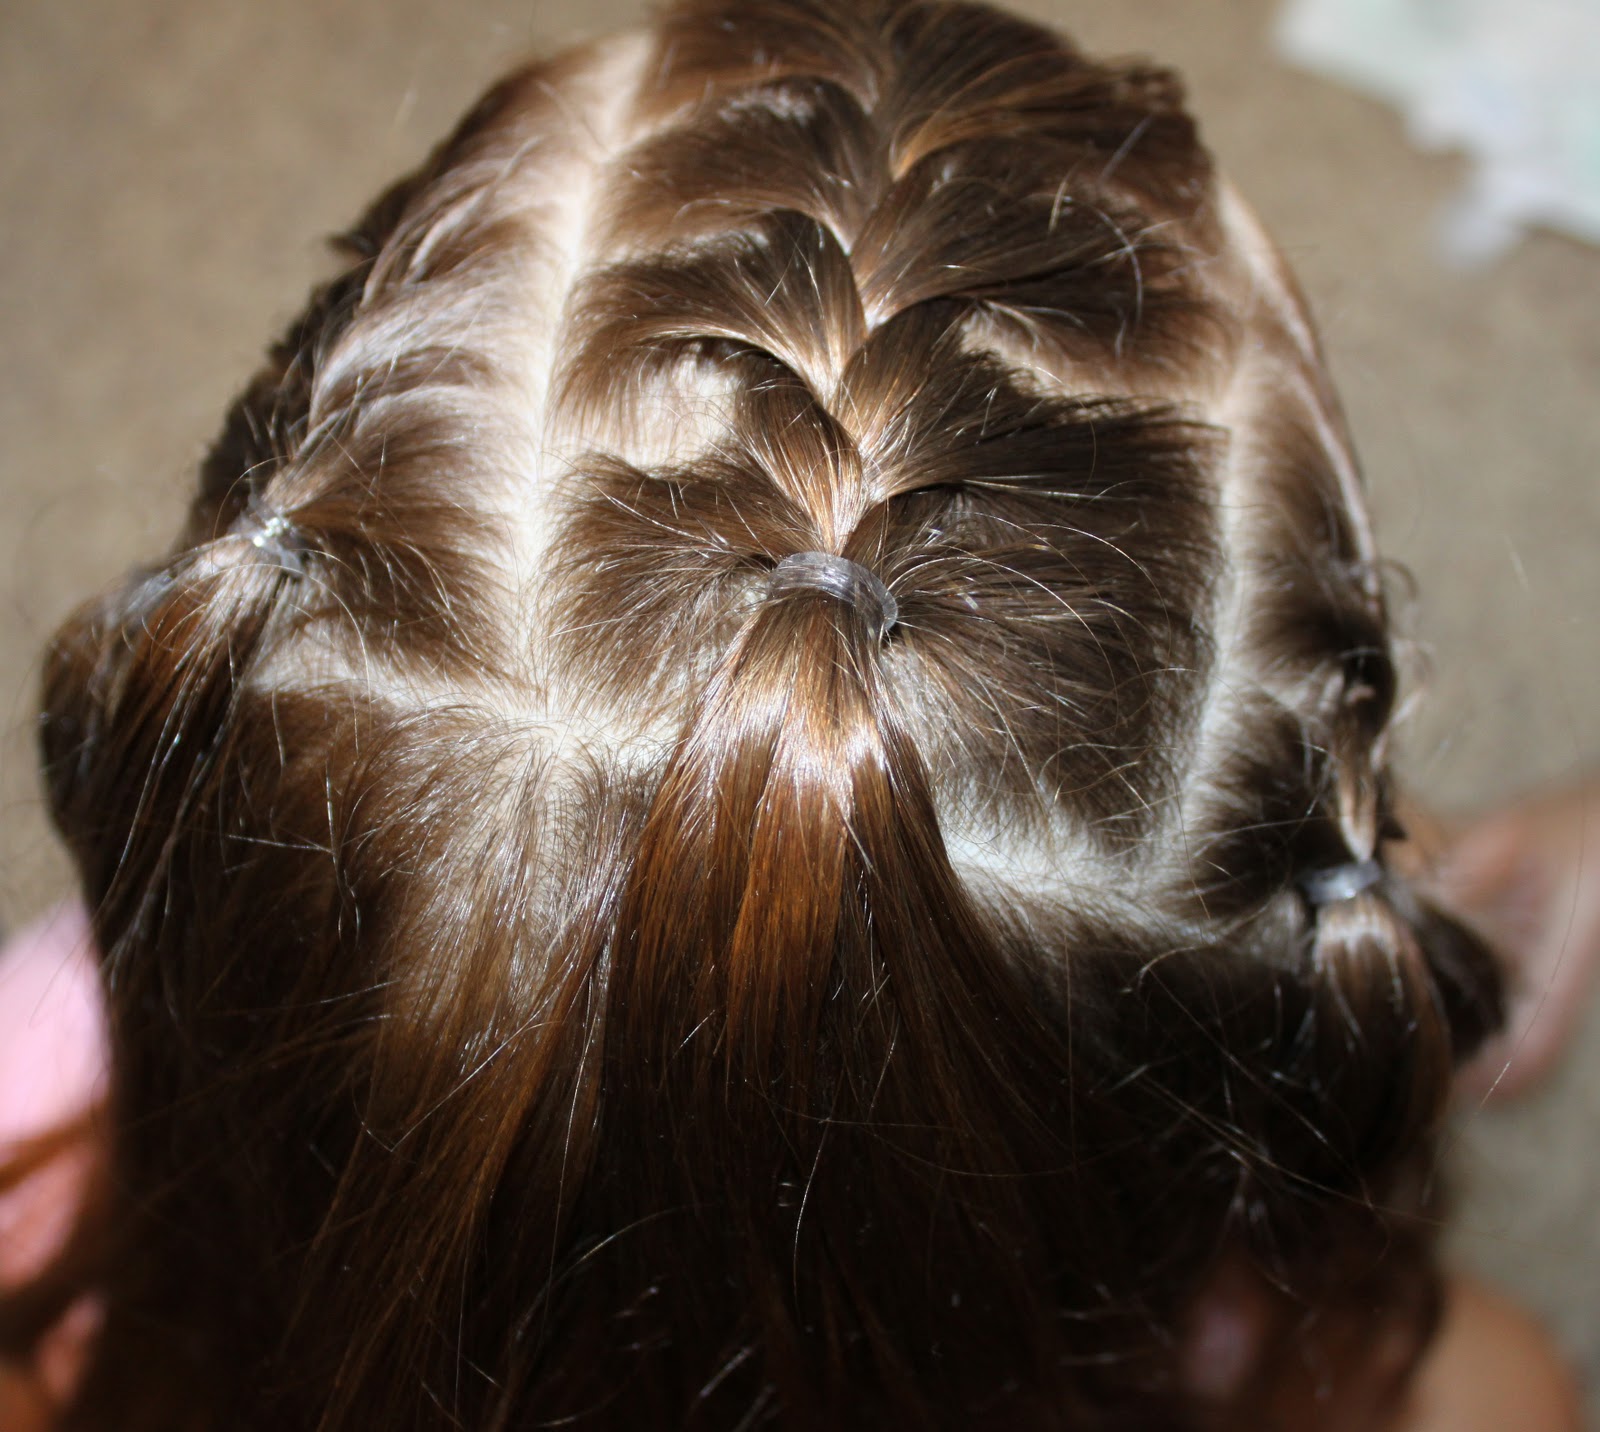
I made a very small french braid above her ear.  Then make a parallel braid above the first.  The top braid goes from the center of her head straight back.  Do the same on the other side of her head.  There will be 5 braids all together.

Once the braids are done put all the hair into a ponytail.
I didn't pull the hair all the way through on the last round through the elastic.

Wednesday, November 10, 2010

1/2 Fish Tail Braid

I apologize for only having one picture, it was one of those days with lack of cooperation.
So I will do my best to explain.
I did a fish tail braid (for those of you who don't know what a fish tail braid is.  You use 2 strands instead of 3).  I braided all her sides back and then secured with an elastic.

Tuesday, October 26, 2010

Double Angel Braid Headband


Start along one side of her face and make an angel braid.  This is a braid where you only pick up hair from one side.  I pulled the hair from the front of her face as shown below.
Next make a parallel angel braid as shown below.  Do this to both sides of her head. 
 Below is a picture of the other side of her head as well.
 Take all 4 ends of the braids and pull them to the bottom, back of her neck and secure them together with an elastic.
 Below is a top view of the finished hairstyle.


Saturday, October 23, 2010

How to Make a Poof

I recently got asked how I do my daughters poof.  I am going to attempt to explain
With my oldest daughter we often times just pull her hair back and use the bobby pins to push the poof forward.  I also use a straight end comb (rat tail comb) and put it evenly under a small layer of hair in the front and pull slightly.   This smooth out the hair and poofs it up.
However if we want a bigger poof.  This is the trick we use.
 Start by making your parts and pull the rest of the hair out of your way.

Next make a part in the center of your hair for the poof.  Move the hair across the front of her face out of the way for a moment.
Then pull the back half of the hair into an elastic and push it forward and secure with bobby pins.  **If you criss cross the bobby pins they say in much better.

Now take the front piece of hair and comb it over the poof and secure it with bobby pins.  If your daughters hair is too thin to stay with just bobby pins use an elastic and then use the bobby pins to push the hair forward.

.

Thursday, October 21, 2010

Poof with Small Braids

Start by making a poof in the front center of her head.
 Along each side of the poof take a small amount of hair and make a braid.
 Wrap the braids around the ponytail holder and secure it with bobby pins.
 Below is the side view of her hair.
 The back view


Related Posts Plugin for WordPress, Blogger...