Wednesday, June 22, 2011

1 Pigtail 1 Braid

To give a little history of this hair style you must understand that I would have never created a style that is one braid one pigtail.  This style is all designed by the 4 year old who has wore this style for about 2 weeks straight.  I finally decided I had better share this with everyone.  Some of you moms out there might just understand what its like to have a spunky daughter like mine.

I first made a small center poof.  I used the bobbie pin that you can see below to give her thin hair an actual poof look.  Then we split the poof hair and made 2 pigtails.
She always picked which side was the braid and which one was the ponytail.   
I finished off the ponytail by putting ringlets. 


Wednesday, June 15, 2011

Easter Hair

Katherine took this picture of her daughters Easter outfit and put it in a photo contest on Parent Magazine's website. Everyone Please go vote for her?

Katherine sent this cute Easter hairstyle into me and I wanted to share it with everyone.  She tried to make a cross. She used the technique she learned from me where you make the ponytail gathered into another ponytail. She made one small ponytail at the top of her head, then split it to two other ponytails. She made a diagram to show how she did it. The diagram is below.

She then wrapped each line with ribbon. She wrote "But as you can see in the picture, it's hard to make out a cross. So I just put pink and blue clips at the corners and it came out alright. I think next time I try this, I'd put the ponytails farther from each other."


I think she did an amazing job and I can see the cross.  I will have to try this on my daughter too!


Monday, June 13, 2011

Sides Up into Outie Braid

On this style you are going to make an outie braid rather than a flat braid. 
I wanted the braid to pop out. 
In order to get an out braid rather than a flat braid you cross the hair under instead of over.
I started the braid on her left side and braided her bangs back and continued to frenchbraid until all her sides were pulled into the braid.  Finish braiding the hair to the ends.

The right side is much easier I only frenchbraided it for about 3 crossovers then continue the braid all the way to meet the other braid.  Secure in the middle of her head with an elastic.

Thursday, May 26, 2011

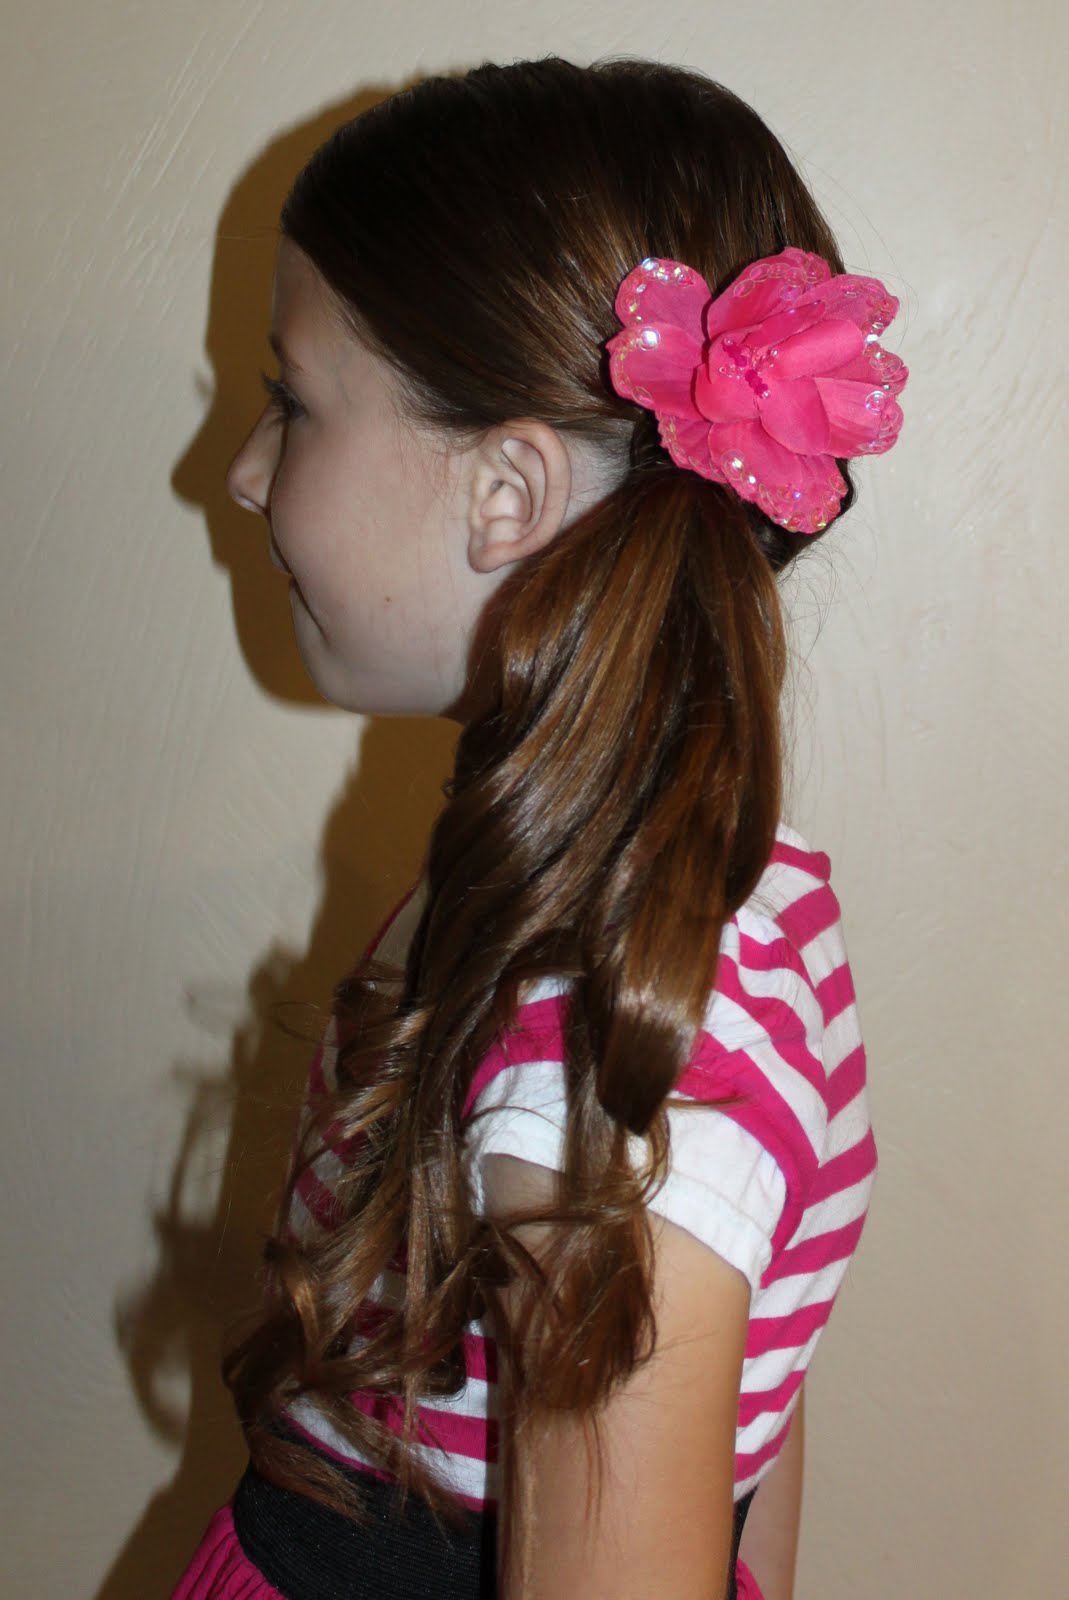
Low French Braid to Side Pony

This one is very similar to the rolling into a side ponytail.
I started a french braid just above her right ear.
I continued to french braid along the back of her head until it reached the right hair. 
Then I secured it with an elastic. 
I took a small amount of hair and wrapped around the elastic. I secure that small amount of hair with a small bobbie pin. 
Then we added a flower for our accessory. 

Thursday, May 19, 2011

A Powerful Message!

I just recently received this email below.  I was so touched by this that I wanted to share it with everyone else.  There is nothing in this world more important than making our kids feel good about themselves.  In "normal" circumstances it is the mother that takes on the roll to teach our kids about hygiene.  This story below goes beyond the normal.  The email is from a single dad and I applaud him for caring about his daughter so much.

Here is the email
My name is Josh and i am a single dad with custody of my 6 year old daughter. I enjoy doing her hair at first i did simple single braids and even curled it almost to perfection which took two and half hours each time, it looked so awesome. I want to thank you for your blog before i found it i ran out of creativity and ideas with what to do with her hair.


It ended up down quite a few days this school year which she likes but it is so fun when i do her hair because of her excitement and how proud she is to tell everyone i did it for her. As much as i would like to curl her hair everyday it is just not feasible with the time not to mention the damage it would do. Your site has given me so many ideas and concepts to do her hair.

Thank you,
Related Posts Plugin for WordPress, Blogger...